Showing posts with label variables. Show all posts

Create an Initialization Block for Session Variables


Create an Initialization Block for Session Variables

Session variables are like dynamic repository variables in that they obtain their values from initialization blocks. Unlike dynamic repository variables, however, the initialization of session variables is not scheduled.
When a user begins a session, Oracle BI Server creates new instances of session variables and initializes them. Unlike a repository variable, there are as many instances of a session variable as there are active sessions on Oracle BI Server. Each instance of a session variable could be initialized to a different value.
A session is an instance of a user running the client application. The session starts when the application is started and ends when the application is exited.
To create an initialization block for session variables, perform the following steps:
1.Return to the SH repository, which should still be open in online mode in the Administration Tool.
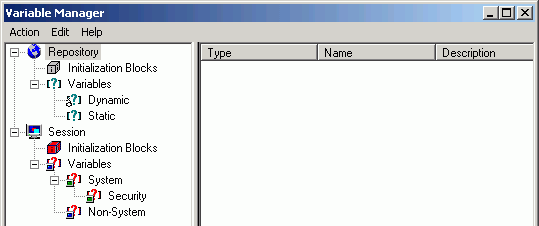
2.Click Manage > Variables to open the Variable Manager.

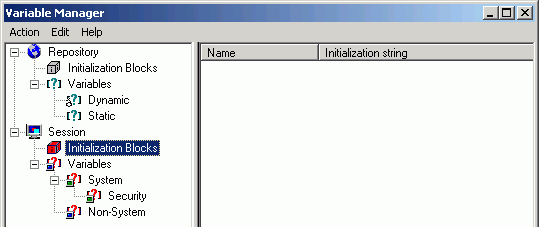
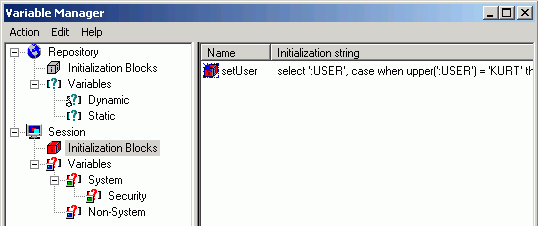
3.Click Session > Initialization Blocks.

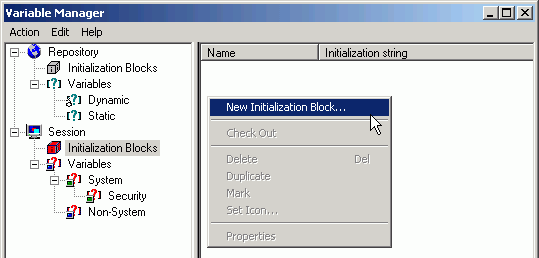
4.Right-click in the white space on the right and select New Initialization Block.

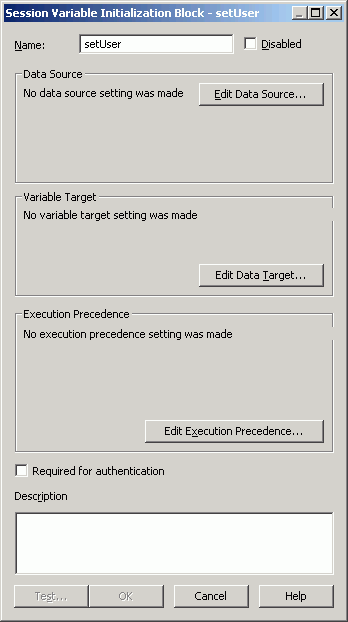
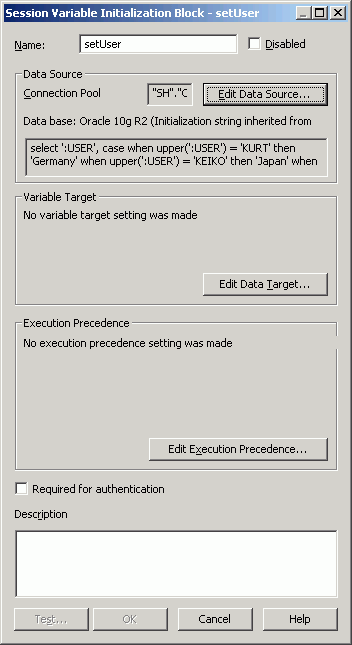
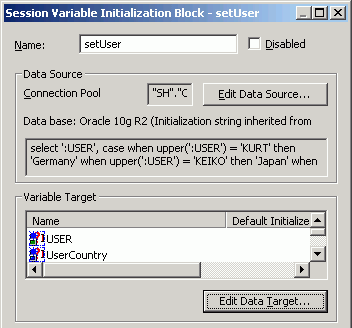
5.In the Session Variable Initialization Block dialog box, type setUser in the Name field.

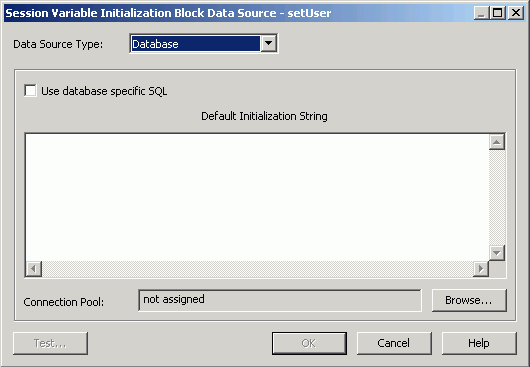
6.Click the Edit Data Source button to open the Session Variable Initialization Block Data Source dialog box.

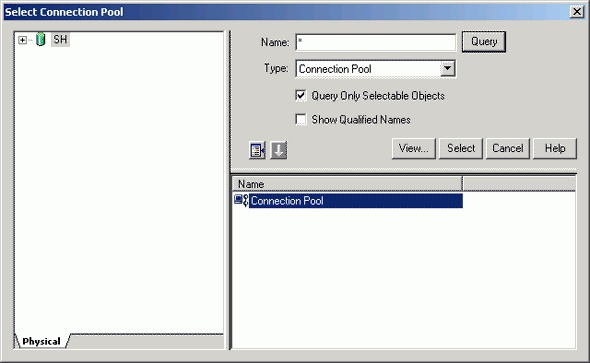
7.Click the Browse button and select SH > Connection Pool in the Select Connection Pool dialog box.

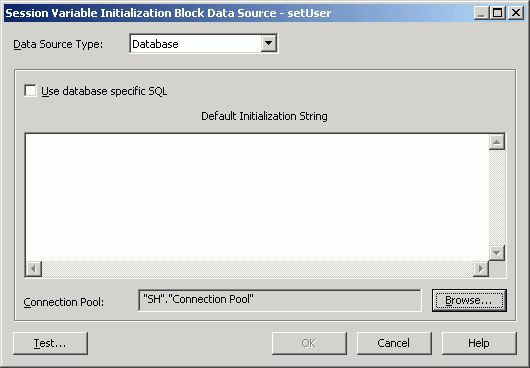
8.Double-click Connection Pool or click the Select button to add the connection pool to the Session Variable Initialization Block Data Source dialog box.

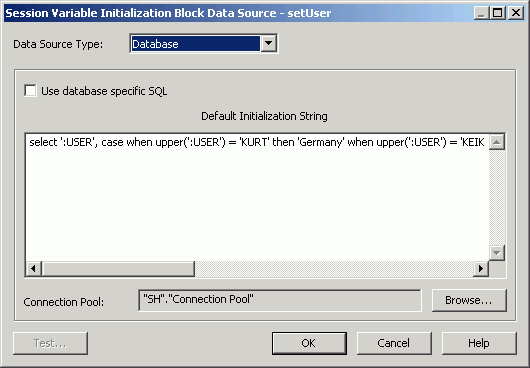
9.In the Default Initialization String field, type the following initialization string:
select ':USER', case when upper(':USER') = 'KURT' then 'Germany' when upper(':USER') = 'KEIKO' then 'Japan' when upper(':USER')= 'CHARLES' then 'United Kingdom' when upper(':USER') = 'KAREN' then 'United States of America' end, 'CountryManagers', 2 from Dual


10.Click OK to close the Session Variable Initialization Block Data Source dialog box. The initialization string is visible in the Session Variable Initialization Block dialog box.

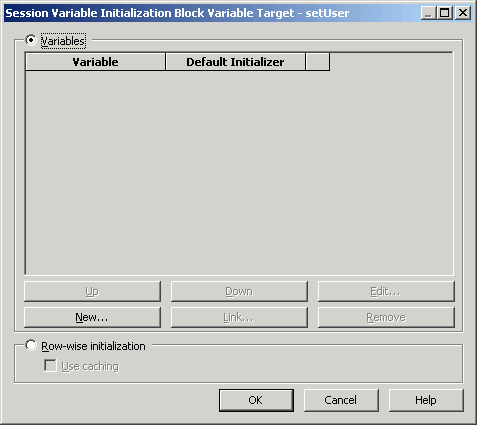
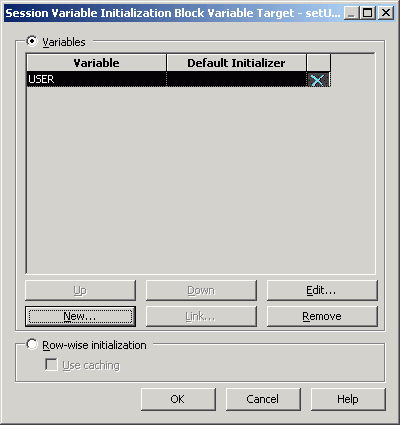
11.Click Edit Data Target to open the Session Variable Initialization Block Variable Target dialog box.

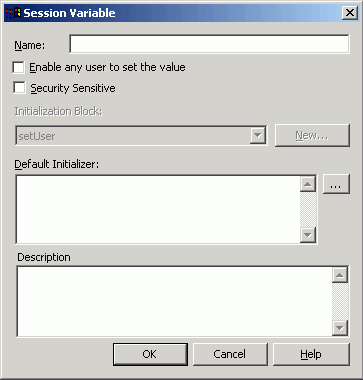
12.Click New to open the Session Variable dialog box.

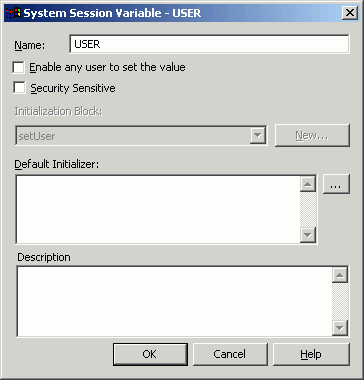
13.In the Name field, type USER.

14.Click OK to close the Session Variable dialog box.
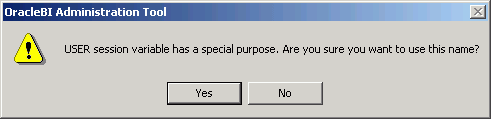
15.Click Yes when prompted about the USER session variable having a special purpose.

16.The USER variable is added to the Session Variable Initialization Block Variable Target dialog box.

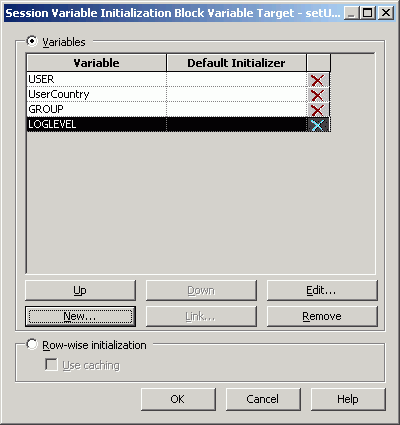
17.Repeat the steps and add three more variables: UserCountryGROUP, and LOGLEVEL. Click Yes when promoted about the GROUP and LOGLEVEL session variables having a special purpose. The order is important. The order of the variables must match the order of the values for the variables in the initialization string in the initialization block.

18.Click OK to close the Session Variable Initialization Block Variable Target dialog box. The variables are displayed in the Variable Target section of the Session Variable Initialization Block dialog box.

19.Click OK to close the Session Variable Initialization Block dialog box. The setUser initialization block is visible in the Security Manager.

20.Click Action > Close to close the Variable Manager.
21.Check in changes.
22.Save the repository.


To create a dynamic repository variable, :


To create a dynamic repository variable, perform the following steps:

1.Return to the SH repository open in online mode.
2.Click Manage > Variables to open the Variable Manager.
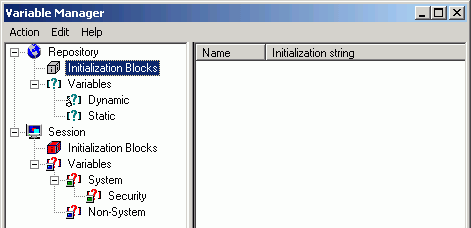
3.Click Repository > Initialization Blocks.

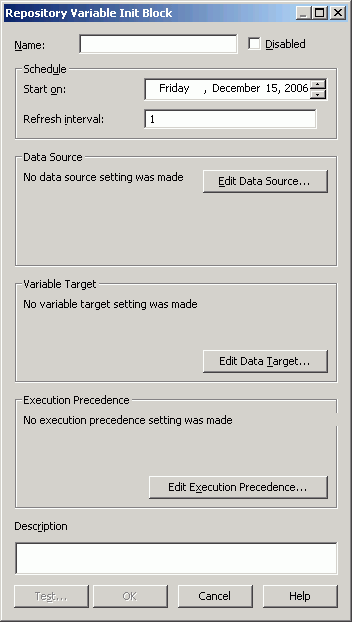
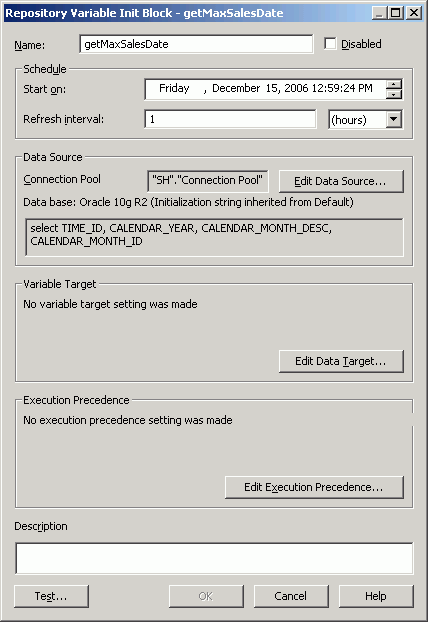
4.Right-click the white space and select New Initialization Block to open the Repository Variable Init Block dialog box.

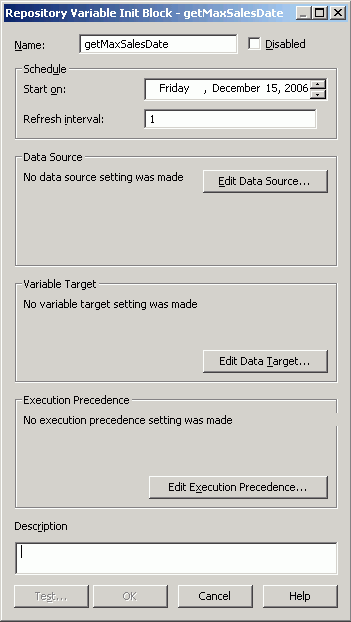
5.Name the initialization block getMaxSalesDate.

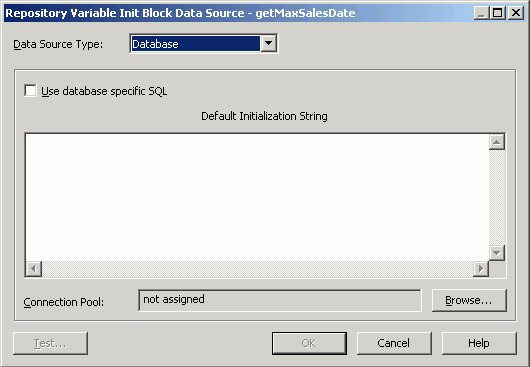
6.Click Edit Data Source to open the Repository Variable Init Block Data Source dialog box.

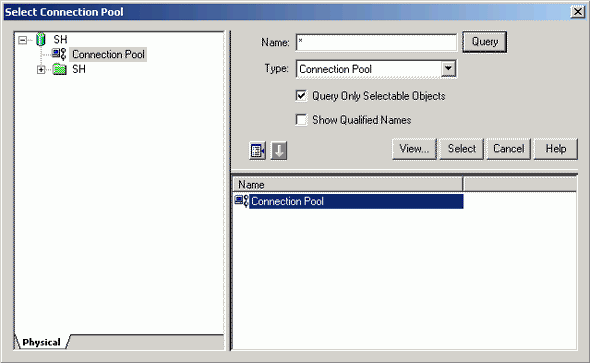
7.Click the Browse button to open the Select Connection Pool dialog box.

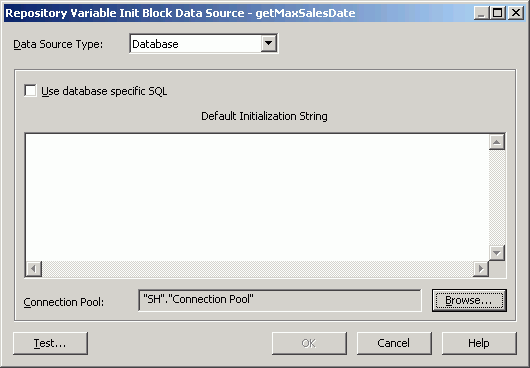
8.Double-click the SH > Connection Pool object to add it to the Connection Pool field in the Repository Variable Init Block Data Source dialog box.

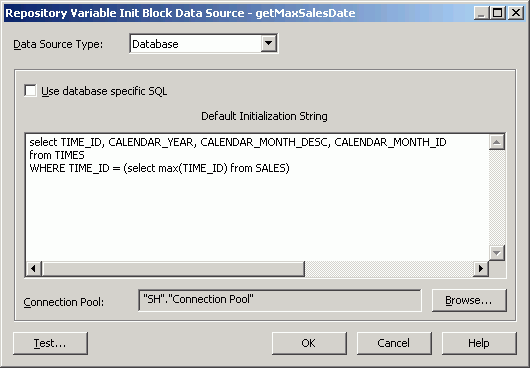
9.In the Default Initialization String field, type the following SQL:
select TIME_ID, CALENDAR_YEAR, CALENDAR_MONTH_DESC, CALENDAR_MONTH_ID from TIMES
WHERE TIME_ID = (select max(TIME_ID) from SALES)

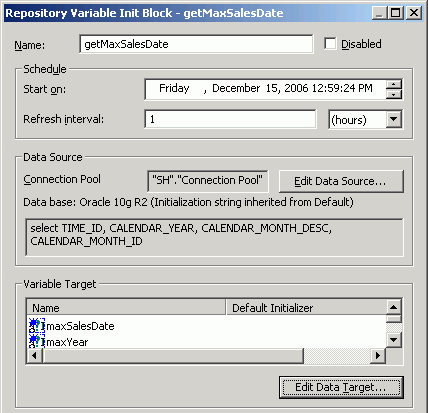
10.Click OK to close the Repository Variable Init Block Data Source dialog box. The connection pool and initialization string are added to the Repository Variable Init Block dialog box.

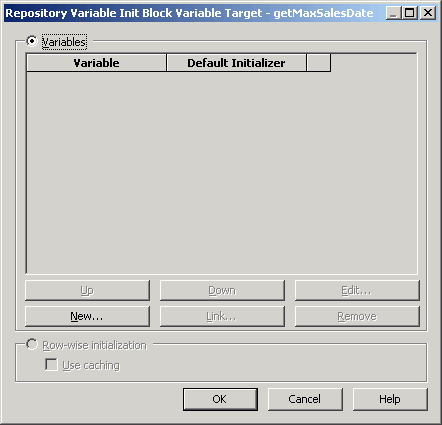
11.Click Edit Data Target to open the Repository Variable Init Block Variable Target dialog box.

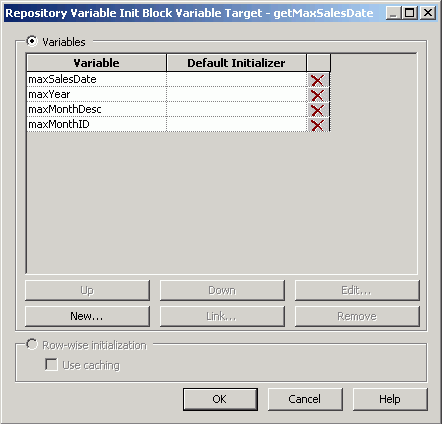
12.Use the New button to create four variables: maxSalesDatemaxYearmaxMonthDesc, and maxMonthID. The order is important. The order of the variables must match the column order in the initialization string.

13.Click OK to close the Repository Variable Init Block Variable Target dialog box. The variables appear in the Variable Target field in the Repository Variable Init Block dialog box.

14.Click Edit Data Source to open the Repository Variable Init Block Data Source dialog box.
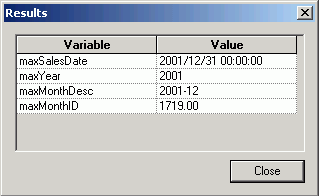
15.Click Test and verify you get the results in the picture.

16.Close Results.
17.Click OK to close the Repository Variable Init Block Data Source dialog box.
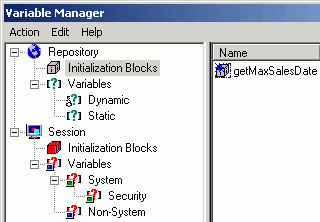
18.Click OK to close the Repository Variable Init Block dialog box. The getMaxSalesDate initialization block is displayed in the Variable Manager.

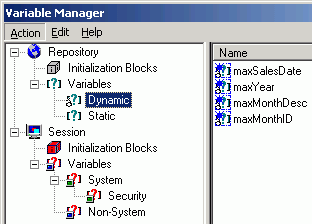
19.Select Repository > Initialization Blocks > Variables > Dynamic to see the variables displayed in the Variable Manager.

20.Click Action > Close to close the Variable Manager.
21.Check in changes.
22.Select File > Check Global Consistency. If the Consistency Check Manager displays any errors, edit the repository to correct the errors before continuing. If there are no error messages, close the Consistency Check Manager.
23.Save the repository.
24.Return to Answers.
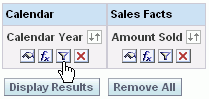
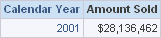
25.Build the following query:
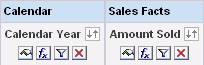
Calendar.Calendar YearSales Facts.Amount Sold.

26.Click the Add Filter button for the Calendar Year column.

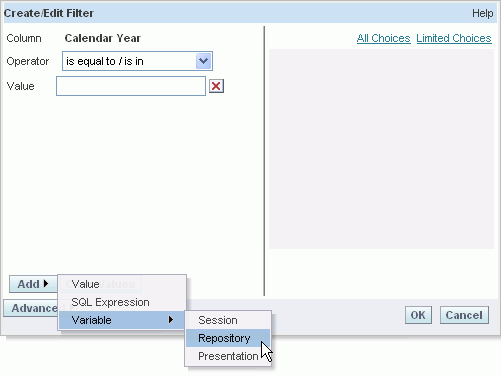
27.In the Create/Edit Filter dialog box, click Add > Variable > Repository.

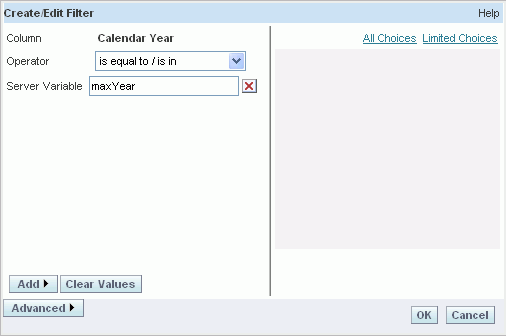
28.In the Server Variable field, type maxYear.

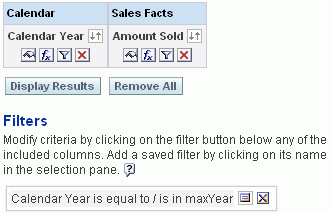
29.Click OK to close the Create/Edit Filter dialog box. The filter is added to the request.

30.Click Results and verify that Calendar Year returns the expected result.


Initialization Blocks


It is recommended to create a dedicated connection pool for initialization blocks. For more information, refer to Creating or Changing Connection Pools.
For more information about initialization blocks, refer to About Using Initialization Blocks With Variables.
To create an initialization block, perform the following steps:
  1. Assigning a Name and Schedule to Initialization Blocks
  2. Selecting and Testing the Data Source and Connection Pool.
  3. Associating Variables With Initialization Blocks
  4. Establishing Execution Precedence

ssigning a Name and Schedule to Initialization Blocks


For repository variables, you can specify the day, date, and time for the start date and a refresh interval.
To assign a name and schedule to initialization blocks
  1. From the Administration Tool menu bar, select Manage > Variables.
  2. In the Variable Manager dialog box, from the Action menu, choose New > Repository (or Session) > Initialization Block.
  3. In the Variable Init Block dialog box, type a name for the block. (The NQ_SYSTEM initialization block name is reserved.)
  4. (Repository init blocks) In the Schedule area, select a start date and time and the refresh interval.
  5. (Session init blocks) Select the following check boxes when appropriate:
    • Disabled. When selected, disables the initialization block.
      NOTE:  In the Variables Manager, the right-click menu for an existing initialization block contains a Disable or Enable toggle value. This allows you to change this property without having to open the initialization block dialog box.
    • Required for authentication. Used when creating an initialization block for authenticating users.
The next step is to select the data source and connection pool.

Selecting and Testing the Data Source and Connection Pool


If you select Database as the data source type, the values returned by the database for the columns in your SQL statement will be assigned to variables that you associate with the initialization block. For session variable initialization blocks, you can select LDAP or Custom Authenticator.
If you select Database as the Data Source Type, the SQL used to refresh the variable must reference physical tables that can be accessed through the connection pool specified in the Connection Pool field. The tables do not have to be included in the physical layer of the metadata. At run time, if an initialization string for the database type has been defined, this string will be used. Otherwise, the default initialization SQL for the database type will be used. You can overtype this string.
When you create SQL and submit it directly to the database (for example when using database specific SQL in initialization blocks), the SQL bypasses Oracle BI Server. The order of the columns in the SQL statement and the order of the variables associated with the init block determine which columns are assigned to each variable.
NOTE:  You should test this SQL using the Test button in the Variable Init block Data Source dialog box. If the SQL contains an error, the database will return an error message.
This following example topics contain examples of initialization strings that might be used with Delivers.
Example of an SQL Statement When Site Uses Delivers
select username, groupname, dbname, schemaname from users
where username=':USER'
NQS_PASSWORD_CLAUSE(and pwd=':PASSWORD')NQS_PASSWORD_CLAUSE
This SQL contains two constraints in the WHERE clause:
':USER' (note the colon and the single quotes) equals the ID the user types when logging in.
':PASSWORD' (again, note the colon and the single quotes) is the password the user enters. This is another system variable whose presence is always assumed when the USER system session variable is used. You do not need to set up the PASSWORD variable, and you can use this variable in a database connection pool to allow passthrough login using the user's user ID and password. You can also use this variable in a SQL statement if you so desire.
When using external table authentication with Delivers, the portion of the SQL statement that makes up the :PASSWORD constraint needs to be embedded between NQS_PASSWORD_CLAUSE clauses.
The query will return data only if the user ID and password match values found in the specified table. You should test the SQL statement outside of the Oracle BI Server substituting valid values for the USER and PASSWORD variables and removing the NQS_PASSWORD_CLAUSE clause.
Example of an SQL Statement When Site Does Not Use Delivers
select username, groupname, dbname, schemaname from users
where username=':USER'
and pwd=':PASSWORD'
This SQL statement contains two constraints in the WHERE clause:
':USER' (note the colon and the single quotes) is the ID the user enters when the user logged in.
':PASSWORD' (again, note the colon and the single quotes) is the password the user enters. This is another system variable whose presence is always assumed when the USER system session variable is used. You do not need to set up the PASSWORD variable, and you can use this variable in a database connection pool to allow passthrough login using the user's user ID and password. You can also use this variable in a SQL if you so desire.
The query will return data only if the user ID and password match values found in the specified table. You should test the SQL statement outside of the Oracle BI Server, substituting valid values for the USER and PASSWORD variables.
To select a data source and connection pool for initialization blocks
  1. From the Administration Tool menu bar, select Manage > Variables.
  2. In the Variable Manager dialog box, double-click the variable.
  3. In the Variable Initialization Block dialog box, click Edit Data Source.
  4. In the Variable Initialization Block Data Source dialog box, from the Data Source Type drop-down list, select one of the following types.

    Data Source Type
    Description
    Database
    Repository and session variables.
    XML
    Repository and session variables.
    LDAP
    Session variables.
    Custom Authenticator
    Session variables. For more information, see About Authenticating Users Using Initialization Blocks.
  5. If you selected Database in the Data Source Connection drop-down list, perform the following steps:
    1. Select the connection pool associated with the database where the target information is located by clicking Browse.
      CAUTION:  If you do not select a connection pool before typing the initialization string, you will receive a message prompting you to select the connection pool.
    2. In the Browse dialog box, select the connection pool and click OK.
      NOTE:  Select a connection pool before typing an initialization string.
      (Optional) Select the Use Database Specific SQL check box and in the Database pane, expand and select the database and its associated string.
    3. In the Initialization string text box, type the SQL initialization string needed to populate the variables.
    4. (Optional) Click Test. Tests the data source connectivity for the SQL statement.
  6. If you selected XML in the Data Source Connection area, perform the following steps:
    1. Select the connection pool associated with the database where the target information is located by clicking Browse.
    2. In the Initialization string text box, type the SQL initialization string needed to populate the variables.
  7. If you selected LDAP in the Data Source Connection area, perform the following steps:
    1. Click Browse to select an existing LDAP Server or click New to open the General tab of the LDAP Server dialog box and create an LDAP Server.
    2. Click OK to return to the Initialization Block dialog box.
      The LDAP server name and the associated domain identifier appear in the Name and Domain identifier columns.
  8. If you selected Custom Authenticator in the Data Source Connection area, complete the fields using the following list as a guide.

    Field
    Description
    Authenticator plug-in
    Type or browse for the DLL authenticator file.
    Configuration parameters
    Can be used to specify a configuration file.
    Cache never expires
    When selected, cache never expires and has to be purged manually.
    Cache persistence time
    When selected, a text box and drop-down list become available, allowing you to type a number in the text box and select days, hours, minutes, or seconds as the time increment. The cache will automatically expire after this time passes.
    Number of cache entries
    Maximum number of cache entries.
  9. Click OK.

Testing the Initialization Block

You should test the SQL using the Test button or an SQL tool such as the Oracle BI Client utility. If you use an SQL tool, be sure to use the same DSN or one set up identically to the DSN in the specified connection pool.
In Online editing mode, Initialization Block tests will not work with connection pools set to use :USER and :PASSWORD as the user name and password. In offline mode, the Set values for variables dialog box appears so that you can populate :USER and :PASSWORD.
To test the initialization block (optional)
  1. From the Administration Tool menu bar, select Manage > Variables.
  2. In the Variable Manager dialog box, double-click the last variable that you want to be initialized.
  3. In the Variable Initialization Block dialog box, click Test.
  4. In the Set value for the variables dialog box, verify the information is correct, and then click OK.
  5. In the View Data from Table dialog box, type the number of rows and the starting row for your Query, and then click Query.
    The Results dialog box lists the variables and their values.
The next step is to associate variables with the initialization block.

Associating Variables With Initialization Blocks


The SQL SELECT statement in the Default initializer list can contain multiple columns. The order of the columns in the SQL statement and order of the variables associated with the initialization block determine the column value that is assigned to each variable. Therefore, when you associate variables with an initialization block, the value returned in the first column will be assigned to the first variable in the list.
Repository Variables
When you open a repository in online mode, the value shown in the Default initializer field of the Initialization Block dialog box is the current value of that variable as known to the Oracle BI Server.
NOTE:  The number of associated variables can be different from the number of columns being retrieved. If there are fewer variables than columns, extra column values are ignored. If there are more variables than columns, the additional variables are not refreshed (they retain their original values, whatever they may be). Any legal SQL can be executed using an initialization block, including SQL that writes to the database or alters database structures, assuming the database permits the user ID associated with the connection pool to perform these actions.
If you stop and restart the Oracle BI Server, the server automatically executes the SQL in the repository variable initialization blocks, re-initializing the repository variables.
Session Variables
For session variable initialization blocks, you can select Row-wise initialization. The Cache variables check box is automatically selected when you select the Row-wise initialization check box. Selecting the cash variables option directs the Oracle BI Server to store the results of the query in a main memory cache. For more information, refer to Row-Wise Initialization.
The Oracle BI Server uses the cached results for subsequent sessions. This can reduce session startup time. However, the cached results may not contain the most current session variable values. If every new session needs the most current set of session variables and their corresponding values, you clear this check box.
To associate variables with the initialization block
  1. From the Administration Tool menu bar, select Manage > Variables.
  2. In the Variable Manager dialog box, double-click the variable.
  3. In the Variable Initialization Block dialog box, click Edit Data Target.
  4. In the Variable Initialization Block Variable Target dialog box, you can select one of the following:
    • Variables. Associates variables with the initialization block.
    • Row-wise initialization. Used with session init blocks only. For more information, see Row-Wise Initialization.
      If you select Row-wise initialization, the Use caching check box becomes available.
  5. If you select the Variables option, perform one of the following steps:
    1. Click new, and in the Variable dialog box, create a new variable.
      NOTE:  For the Custom Authentication data source type (Session variables), the variable USER is required.
      For information about creating variables, see Using the Variable Manager.
    2. Click Link, to associate an existing variable with an initialization block.
      • In the Browse dialog box, select the variable to be refreshed by this initialization block, and then click OK.
  6. To reorder variables, select a variable, and then click Up or Down.
  7. To remove a variable from association with this block, select the variable, and then click the remove button.
  8. Click OK.
The next step is to establish execution precedence.

Establishing Execution Precedence


When a repository has more than one initialization block, you can set the order (establish the precedence) in which the blocks will be initialized.
First, you open the block that you want to be executed last and then add the initialization blocks that you want to be executed before the block you have open. For example, suppose a repository has two initialization blocks, A and B. You open initialization block B, and then specify that block A will execute before block B. This causes block A to execute according to block B's schedule, in addition to its own.
To establish execution precedence
  1. From the Administration Tool menu bar, select Manage > Variables.
  2. In the Variable Manager dialog box, double-click the last variable that you want to be initialized.
  3. In the Variable Initialization Block dialog box, click Edit Execution Precedence.
  4. In the Variable Initialization Block Execution Precedence dialog box, click Add.
    NOTE:  Add is only available if unselected initialization blocks are available.
  5. In the Browse dialog box, select the blocks that should be initialized before the block that you have open, and then click OK.
    CAUTION:  Make sure you add the blocks in the order that you want them to be initialized.
  6. To remove a block, in the Variable Initialization Block Execution Precedence dialog box, select the block you want to remove, and then click Remove.
  7. Click OK.
  8. If you wish the initialization block to be required, in the Variable Initialization Block dialog box, select the Required for authentication check box.
  9. Click

  10.  


Initialization Blocks With Variables


Initialization blocks are used to initialize dynamic repository variables, system session variables, and nonsystem session variables. For example, the NQ_SYSTEM initialization block is used to refresh system session variables.
An initialization block contains the SQL that will be executed to initialize or refresh the variables associated with that block. The SQL must reference physical tables that can be accessed using the connection pool specified in the Connection Pool field in the Initialization Block dialog box.
If you want the query for an initialization block to have database-specific SQL, you can select a database type for that query. If a SQL initialization string for that database type has been defined when the initialization block is instantiated, this string will be used. Otherwise, a default initialization SQL string will be used.
CAUTION:  By default, when you open the Initialization Block dialog box for editing in online mode, the initialization block object is automatically checked out. While the initialization block is checked out, the Oracle BI Server may continue to refresh the value of dynamic variables refreshed by this initialization block, depending on the refresh intervals that are set. When you check the initialization block in, the value of the dynamic variables is reset to the values shown in the Default initializer. If you do not want this to occur, use the Undo Check Out option.

Initializing Dynamic Repository Variables

The values of dynamic repository variables are set by queries defined in the Initialization string field of the Initialization Block dialog box. You also set up a schedule that the Oracle BI Server will follow to execute the query and periodically refresh the value of the variable. If you stop and restart the Oracle BI Server, the server automatically executes the SQL in repository variable initialization blocks, reinitializing the repository variables.
The Oracle BI Server logs all SQL queries issued to retrieve repository variable information in the NQQuery.log file when the Oracle BI Administrator logging level is set to 2 or higher. You should set the logging level to 2 for the Oracle BI Administrator user ID to provide the most useful level of information. The default location for the NQQuery.log file is the Log folder in the Oracle BI Server software installation folder (\OracleBI). For more information about user-level logging, refer to Administering the Query Log.

Initializing Session Variables

As with dynamic repository variables, session variables obtain their values from initialization blocks. Unlike dynamic repository variables, session variables are not updated at scheduled time intervals. Instead, the Oracle BI Server creates new instances of those variables whenever a user begins a new session. The values remain unchanged for the session's duration.
The Oracle BI Server logs all SQL queries issued to retrieve session variable information if Logging level is set to 2 or higher in the Security Manager User object or the LOGLEVEL system session variable is set to 2 or higher in the Variable Manager.
The default location for the NQQuery.log file is the Log folder in the Oracle BI Server software installation folder (\OracleBI). For more information about user-level logging, refer to Administering the Query Log.

Row-Wise Initialization

The row-wise initialization option allows you to create session variables dynamically and set their values when a session begins. The names and values of the session variables reside in an external database that you access through a connection pool. The variables receive their values from the initialization string that you type in the Initialization Block dialog box.
For example, you want to create session variables using values contained in a table named RW_SESSION_VARS. The table contains three columns: USERID, containing values that represent users' unique identifiers; NAME, containing values that represent session variable names; and VALUE, containing values that represent session variable values.
The content of the table is as follows:
USERID
NAME
VALUE
JOHN
LEVEL
4
JOHN
STATUS
FULL-TIME
JANE
LEVEL
8
JANE
STATUS
FULL-TIME
JANE
GRADE
AAA
You create an initialization block and select the Row-wise initialization check box (refer to Process of Creating Initialization Blocks).
For the initialization string, you type the following SQL statement:
select NAME, VALUE
from RW_SESSION_VARS
where USERID='VALUEOF(NQ_SESSION.USERID)'
NQ_SESSION.USERID has already been initialized using another initialization block.
The following session variables are created:
  • When John connects to the Oracle BI Server, his session will contain two session variables from row-wise initialization: LEVEL, containing the value 4; and STATUS, containing the value FULL_TIME.
  • When Jane connects to the Oracle BI Server, her session will contain three session variables from row-wise initialization: LEVEL, containing the value 8; STATUS, containing the value FULL-TIME; and GRADE, containing the value AAA.
Initializing a Variable with a List of Values
You can also use the row-wise initialization option to initialize a variable with a list of values. You can then use the SQL IN operator to test for values in a specified list.
Example: Using the table values in the previous example, you would type the following SQL statement for the initialization string:
select 'LIST_OF_USERS', USERID
from RW_SESSION_VARS
where NAME='STATUS' and VALUE='FULL-TIME'
This SQL statement populates the variable LIST_OF_USERS with a list, separated by colons, of the values JOHN and JANE; for example, JOHN:JANE. You can then use this variable in a filter, as shown in the following WHERE clause:
where TABLE.USER_NAME = valueof(NQ_SESSION.LIST_OF_USERS)
The variable LIST_OF_USERS contains a list of values, that is, one or more values. This logical WHERE clause expands into a physical IN clause, as shown in the following statement:
where TABLE.USER_NAME in ('JOHN', 'JANE')

About Authenticating Users Using Initialization Blocks

You can create a customized authentication module using initialization blocks. An authenticator is a DLL (or shared object on UNIX) written by a customer or developer that conforms to the Oracle BI Authenticator API Specification and can be used by Oracle BI Server to perform authentication and other tasks at run-time. The dynamically loadable authenticator framework (authentication module) is an Oracle BI Server module with a cache layer that uses the authenticator to perform authentication and related tasks at run-time.
Only one authenticator is allowed for each repository. The authentication for the user Administrator is always performed against the repository. Users in the repository are always authenticated against the repository.
Two sample authenticator plug-ins are installed when you install Oracle BI. One is only available for the Windows platform. The other one uses a text file for user information storage and is available to all platforms. We will provide a header file for all of the types that will be used in the dynamically loadable authenticator.
The Oracle BI Administrator asks a developer to implement a dynamically loadable authentication module according to the Oracle BI Authenticator API specification. For more information about this specification, refer to Oracle BI Server Authentication APIs.
After the Oracle BI Administrator creates an authentication object (authenticator plug-in) and specifies a set of parameters for the authentication module, such as configuration file path, number of cache entries, and cache expiration time. The Oracle BI Administrator then associates the authentication object with an initialization block. The Oracle BI Administrator associates the USER variable (required) and other variables with the initialization blocks.
When a user logs in, if the authentication is successful, Oracle BI Server populates a list of variables, as specified in the initialization block. 

Popular Posts